Introduction to GitHub
This section introduces the GitHub web interface, walks through creating a repository, and covers the basics of Markdown and HTML. These topics are important for understanding the basic building blocks of websites and learning how to work with files on GitHub.
Git, GitHub, & GitHub Pages
Before we get started, let’s clarify some terms:
Git is a popular free, distributed version control system–i.e. a piece of software used to track the history of changes in a folder of files. Git can be used on your personal computer, or by online services to track the development of a project, such as…
GitHub, a popular web platform for hosting Git repositories–i.e. a place to store and sync your project files online. Think of it as Google Drive for code with super robust “track changes” baked in. Built around the powerful version control of Git, it provides a handy web interface for managing, editing, and collaborating on repositories.
Originally designed to manage large open-source software projects, GitHub’s use has expanded to many other types of organizations and individuals, with over 40 million users. GitHub provides a bunch of built in project management features including…
GitHub Pages, free static web hosting service available as part of every repository–this means with the click of a button you can fire up a new website!
Intended to host relatively simple sites for your GitHub portfolio or project documentation, GitHub Pages is an ideal solution for creating an open educational resource or personal site to highlight your academic work. Because hosting through gh-pages is free and builds valuable transferable skills, this is a great option for teaching and learning. Users have the opportunity to become creators and participants in global digital culture, developing critical digital literacy about the fabric of the web.
Many organizations and individuals are using GitHub to collaboratively create and publish public websites. For example, Programming Historian, The Carpentries, or this site!
There are soft limits and guidelines for gh-pages usage: sites should be < 1GB, use < 100GB bandwidth per month, and make < 10 builds per hour. If your site exceeds these quotas, GitHub will send you a notice asking you to modify the repository.
All content must follow the community guidelines, e.g. no violence, obscene sex, or illegal stuff.
GitHub Practice
Let’s create a new repository, then write some Markdown and HTML to see how gh-pages works.
Create a New Repository
- Log into GitHub.
- Click the “+” plus icon in the upper right of the nav bar.
- Select “New repository”.
- Fill in “Create a new repository” page:
- “Owner” is you. Every repo is associated with an individual or organization.
- “Repository name” is what you want to call this repo. It must be unique among the owner’s repos. Since this repository will become a website, use all lowercase, no spaces, and no weird characters. Dash (
-) or underscore (_) are okay. - “Public” / “Private”. Anyone can visit a public repository–but that’s okay! The entire web is public, so once you create a website, the code of your website is public anyway. GitHub is mostly open source code, i.e. public repositories with code people can view and copy for free (following the license applied by the owner).
- Check the “Add a README file” option. This makes it easier to get started.
- Finally, click the green “Create repository” button. You will be redirected to your brand new repository!
Take a minute to explore your new repository.
It currently contains one file, README.md that was automatically added.
Check out the “Issues” tab, a great feature for starting conversations and tracking tasks related to the repository.
Activate GitHub Pages
- Click the “Settings” tab.
- Scroll down to the “GitHub Pages” section.
- Under “Source”, use the dropdown to select “main” branch and leave folder as “/ (root)”.
- Click “Save”.
GitHub Pages now allows any branch’s root or “docs” folder to be selected as the source.
Following earlier conventions, creating a branch named gh-pages will automatically active it as the source.
Keep in mind that until recently the default branch was called “master”, rather than “main”, so older documentation may still use that terminology.
README, Markdown, and Editing Intro
You will notice that by default the contents of the README.md file are displayed on the home page of your repository.
This is a convention used in many code projects–README is a place to write the basics about your repository so users will understand what it contains, who made it, and any other information they should know.
On GitHub READMEs are usually written in Markdown (thus the .md extension).
Markdown is a standard to simplify writing content for the web designed to be easy to read and write.
GitHub Markdown Flavor can be used any where on GitHub to format your writing in comments, Issues, and .md files.
The basics are intuitive, much like formatting a plain text email, as can be seen in the Mastering Markdown Guide.
Edit your README using Markdown:
- On your repo home page click the filename “README.md”, which will bring you to the page for that file.
- On the upper right corner of the file click the “pencil” icon to start editing. This will open the web-based text editor.
- Edit your file:
# Heading One

## Heading Two

### Heading Three, etc.

Any text with no empty lines between will become a paragraph.
Leave an blank line between headings and paragraphs.
Font can be *Italic* or **Bold**.
Code can be highlighted with `backticks`.

Hyperlinks look like this [GitHub Help](https://help.github.com/).

A bullet list is created using `*`, `+`, or `-`, like:

- dog
- cat
- muffin

A numbered list is created using a number + `.`, like:

1. one
2. two
6. three
2. four
- When done editing, scroll to the bottom of the page to the “Commit changes” section. Commit is a git concept–basically taking a snap shot of the changes that will be permanently stored in your repository’s history. Every commit records a user name, email, and message.
- Fill in the first text box with your “commit message”, i.e. a short description of what changes you have made. This is your message to the future to help understand the code.
- Click the green “Commit changes” button to complete your first
git commit!
Once you commit, you will immediately see your README’s updated content rendered on the page. Behind the scenes GitHub is converting your Markdown code into HTML for display.
HTML, Index.html, and Create File Intro
Most of the Web is made up of HTML, CSS, and JS:
- HTML (Hypertext Markup Language) provides the structure and content, via a formal syntax for “tagging” the elements of a page such as headings, paragraphs, or lists.
- CSS (Cascading Style Sheets) provides the style.
- JS (JavaScript) provides the interactivity.
When you access a website, the server sends your computer the code which your browser renders into a web page that you can view and interact with. Thus, one fascinating aspect of the web is that everyone must share code to participate.
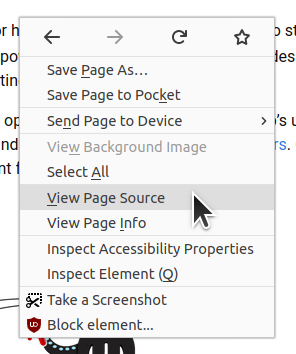
Right click on any web page and select View page source to see the code that is being rendered by the browser (shortcut: Ctrl + U).
Right click on any element in the page and select “Inspect” or “Inspect Element” to open your browser’s built in developer tools.
This is a great way to learn about HTML and to understand how others created the sites you use.
To review the basic building blocks of the web, next let’s create an HTML file. We will start with an index.html file because by default the server provides index as the home page of your site.
- Click the “Code” tab to go to your repository’s home page.
- Click the “Add file” button and select “Create new file”. This will open the web-based text editor.
- Type in the name for your file:
index.html. - Put your cursor in the editor and write some HTML:
<!DOCTYPE html>
<html>
    <head>
        <title>Example Title - appears in browser tab</title>
    </head>
    <body>
        <h1>Header One: Big Text</h1>
        <p>An example paragraph.</p>
        <h2>Header Two</h2>
        <p>Paragraph with <strong>Bold text</strong>.</p>
        <p>A link to <a href="https://github.com">GitHub</a>.</p>
    </body>
</html>
- When done editing, scroll to the bottom of the page to the “Commit changes” section.
- Fill in your “commit message” and click the green “Commit changes” button.
After you commit, you will be redirected to your repo home page. Clicking on the word “commits” in the upper right of the file box will bring you to the history of your repository. Each commit is represented on the page displaying your commit messages. Clicking on the hash (the series of numbers to the right of the commit message) will display all the information about the commit, including all the changes made to files.
Now that we have an index.html, let’s visit our new website.
The URL for any GitHub Pages site follows the pattern:
https://username.github.io/repositoryname/
You can also find the link by looking back in your Settings once gh-pages has been activated.
Each time you make a commit GitHub Pages will re-deploy your files, which might take a minute. Once it is complete (assuming everything goes well!), a green check will appear next to your commit in the history.
Reference
Git & GitHub:
- GitHub Guides, see Hello World for an introduction.
- GitHub Learning Lab
Markdown:
- Mastering Markdown GitHub Guide
- GitHub Markdown documentation
- Markdown and Pandoc for Academic Writing
- Markdown (original spec by John Gruber)
HTML: